Gather These Materials:
- 1 old bedsheet (any size)
- 1 dog clamp (hardware store)
- A bit of aluminum wire, about 16 gauge (hardware store)
- Your summer camp lanyard-making skills
Make The Dog Leash
1. Tear your bedsheet lengthwise into 2″ wide strips. The bedsheet’s length will make a perfect length dog leash. (Thinner strips will make a more delicate leash for a smaller clamp and a tiny dog, but 2″ strips worked fine for my pugs, as well as larger dogs.)
2. Clip the dog clamp to a cabinet handle or clothesline. You’ll need some way to anchor the clamp to hold your leash taut as you’re weaving it.
3. Take 4 strips (the torn edges are just fine!) and feed them through the clamp’s closed end, leaving each strip a 4-5 inch tail that doubles back on itself. See the photo in he slideshow. I know the photo shows only three strips, but that’s ‘cuz I’m an idiot. Use four.
4. Pulling against your anchored clamp to keep things taut, begin weaving the four strips (at first each strip will be double-thick because you are incorporating the 5″ tail.) Use the DIamond Stitch technique you learned at summer camp. In case you forgot, Boondoggle Man can refresh your memory. (Scroll down on his Diamond Stitch page for the helpful photos.)
5. Continue weaving until there are about 4-5 inches of each strip left unwoven. Fold the leash back on itself to create a hand loop (you can unclip the dog clamp from its anchor now), and use a chip clip to hold end of the woven part together while you hand-weave each strip end end back into the leash to close the hand loop. This part is fussy, and the only tricky part of the whole endeavor.
6. Cut about a 12″ length of your aluminum wire and hold one end down on the leash at a point about 1/2 to 1 inch above the dog clamp. Grasp the other end with needlenose pliers and wrap the wire tightly around the leash, catching and anchoring the bottom end of the wire, and stacking the coil up the leash as neatly as you can. When you’re done , use the pliers to bend the end of the wire back under the coil.
7. Well, there is a little bit of sewing after all… finish your leash by tacking down the strip ends that you wove back into the leash when you created the hand loop, and the tail ends on the double-thick portion when you began the leash. This is just to ensure that they stay neat. Just a few stitches per strip will do it.
Voila! Now you have a handsome, eco-friendly, budget-friendly and pooch-friendly leash that will easily last for 5 years or more. When the cloth finally starts to give out, reuse the hardware and recycle another bedsheet.
Some Notes Before You Get Started
A word on color… the first leash I ever made was from a white bedsheet, and it turned gray in no time flat, and stayed that way for the 7+ years that I used it. Now I make them out of dark or bright colors and patterns, and the dirt accumulation is not noticeable, just like a webbing dog leash from the pet emporium. There’s a reason they don’t come in white!
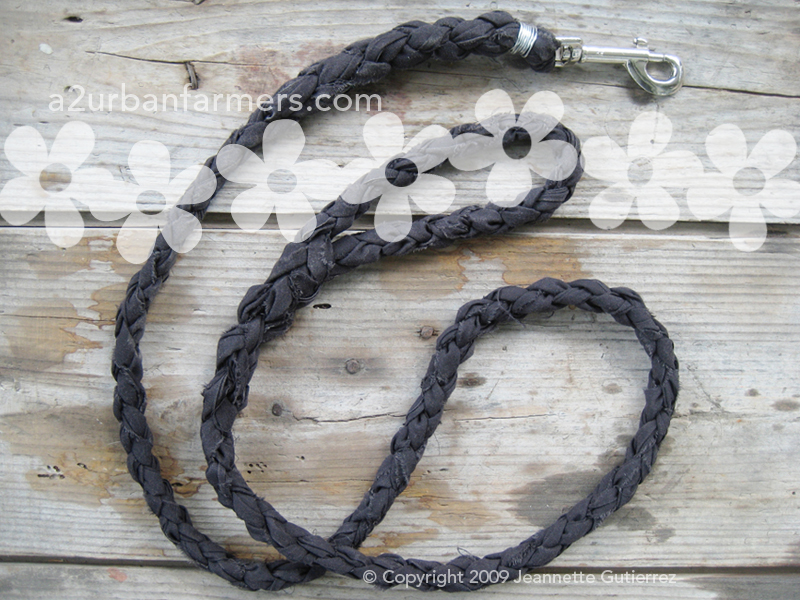
A word on production values…the torn-edge strip technique is super-easy, and the resulting leash has a wonderful rough integrity, but I have also experimented with folding and ironing the strips so the torn edges are hidden, creating a sort of flat ribbon to weave with. You’ll notice that the leash in the slideshow was made this way. It creates a more finished-looking leash. In my experiment, I basted the folded and ironed strip, but found basting was not necessary at all. Anyway, I prefer the torn-edge technique, and here’s what the torn-edge leash looks like.
A word on time-management… if you love this idea, but are too busy to try it yourself, you can buy one from my Etsy shop. The first person to comment on this post (and ask for a leash) gets one free!
A word on credit where credit is due… I cannot remember where I learned how to make these. I know it was way before the internetz, in one of the many “thrifty tips” books I used to have. The original instructions called for a simple braid, but at some point, I started using the 4-strand diamond stitch. A quick Google search doesn’t reveal anyone else who is making these; if you know of someone, please link me up.


I would
D love a leash!!! They are gorgeous!
Hello webmaster do you need unlimited content for your blog ?
What if you could copy content from other pages, make it pass copyscape test and publish on your site –
i know the right tool for you, just search in google:
Ziakdra’s article tool
This article is on 15 spot in google’s search
results, if you want more visitors, you should
build more backlinks to your articles, there is one trick to get
free, hidden backlinks from authority forums, search on youtube; how
to get hidden backlinks from forums